
Ascending Sangonomiya Kokomi: Pearls, Dew, and Hydro Grace
Unlock Sangonomiya Kokomi's full potential: farm Dew of Repudiation, Sango Pearls, and Varunada Lazurite for her Hydro damage ascension.
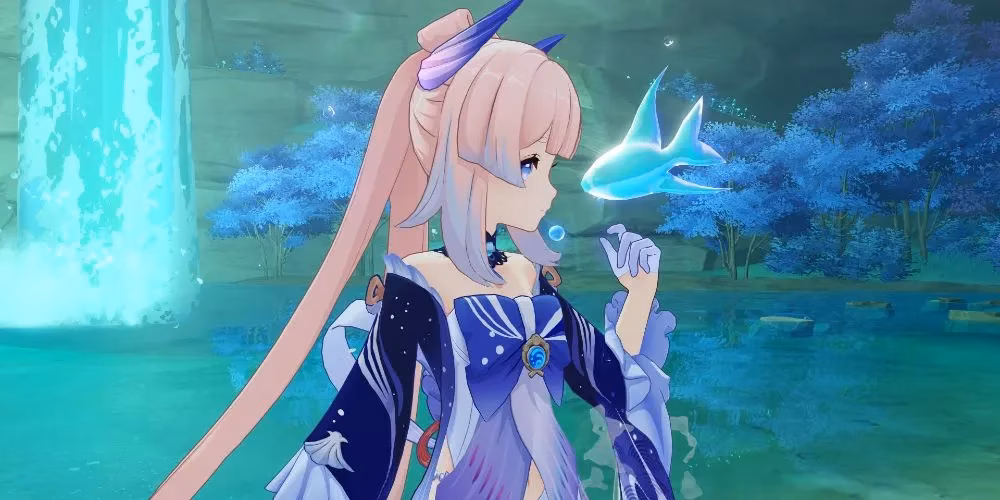
In the gentle, blue-drenched world of Watatsumi Island, I first met Sangonomiya Kokomi during the fleeting Drifting Luminescence event—a moment that felt like catching a moonbeam in a jar. She’s the quiet High Priestess, a 5-star Hydro jewel whose strategic mastery and healing embrace can turn any tide of battle. Yet even the most luminous star needs polish. Ascension is the name of the game, darling, and let me tell you, it’s both a meditative pilgrimage and a right proper grind. With every item I gathered, I wove her power tighter into my team’s fabric, and by the time she hit level 90, those Hydro damage bonuses sang like a siren. So, let me take you through this poetic, slightly maddening journey—from hunting elusive pearls in coral reefs to trading blows with a water-logged cube. Trust me, it’s worth every resin fleck.

The Ascension Ritual: A Glimpse at What’s Required
Before we dive into the deep end, let me lay out the treasure map. Kokomi’s ascent from 20 to 90 is no walk in the park, but the payoffs are delicious: a massive HP pool that feeds her kit, and a capping +28.8% Hydro damage bonus that makes her burst window utterly devastating. Here’s the crux in a tidier form—swiped straight from my own notes after countless resin moons:
| Phase | Key Materials (Highlights) | Max Level | HP at Max | Hydro Bonus |
|---|---|---|---|---|
| 1 | 1x Varunada Lazurite Sliver, 3x Sango Pearl, 3x Spectral Husk | 40 | 5,416 | None |
| 2 | 2x Dew of Repudiation, 10x Sango Pearl, 3x Varunada Fragments | 50 | 6,966 | +7.2% |
| 3 | 4x Dew of Repudiation, 20x Sango Pearl, 6x Varunada Fragments | 60 | 8,738 | +14.4% |
| 4 | 8x Dew of Repudiation, 30x Sango Pearl, 3x Varunada Chunks | 70 | 10,306 | +14.4% |
| 5 | 12x Dew of Repudiation, 45x Sango Pearl, 6x Varunada Chunks | 80 | 11,885 | +21.6% |
| 6 | 20x Dew of Repudiation, 60x Sango Pearl, 6x Varunada Gemstones | 90 | 13,471 | +28.8% |
Feeling a bit overwhelmed? Keep calm and grind on, as they say. The bulk of her ascension hinges on four enigmatic treasures: Dew of Repudiation, Sango Pearls, Spectral Husks/Hearts/Nuclei, and the azure glitter of Varunada Lazurite. Let’s break each down, explorer-style.
The Dew of Repudiation: Facing the Hydro Hypostasis
I’ll be real with you—this is where the irony hits like a tidal wave. Kokomi’s prime ascension boss, the Hydro Hypostasis, is completely immune to Hydro damage. So, my advice? Leave your healer priestess at home, and bring a squad that can throw down some electro-charged devastation or a solid physical whallop. The Hypostasis slumbers beneath Suigetsu Pool, a place that trembles with ancient water magic. Every week, I’d teleport there, heart drumming, with a minimum of 40 Original Resin in my pocket—because forgetting that is a real facepalm moment. Without resin, that Trounce Blossom won’t yield its dewdrops, and I’d be left staring at my empty hands.
The fight itself is a dance. As of 2026, the World Level scaling ensures the Hypostasis drops higher-tier Varunada Lazurite alongside the Dew, which is a lovely two-for-one deal. I remember my first victory: a shower of Slivers and Fragments, and that first precious Dew of Repudiation glinting like a tear. You’ll need 46 of these total if you’re aiming for phase 6—a commitment, but nothing beats that moment when Kokomi’s stats skyrocket.
Sango Pearls: Jewels of the Coral Depths
Now, for the part that truly tests your patience and your lung capacity—Sango Pearls. These pinkish treasures are not sold in any shop, no sir. You must pluck them from the wild, nestled in the vibrant reefs around Watatsumi Island. The absolute jackpot location? Beneath the Sangonomiya Shrine itself. Gliding down through the misty air, I’d dive into those crystalline waters and swim among schools of fish, each pearl a tiny, glowing secret. It felt less like a grind and more like a spiritual retreat; Kokomi’s own temple blessing every find.
I’ll let you in on a cheeky tip: mark your map with star pins wherever you spot a cluster, and revisit them every two real-world days. They respawn, and with a route that circles the shrine’s base and the nearby sunken ruins, you can snag 40+ pearls in one go. You’ll need 168 pearls across all phases—a daunting number, but once you settle into the rhythm, it’s almost meditative. Stay salty, my friend, because the ocean always gives back.
Spectral Droplets: From Husks to Nuclei
The Specters of Inazuma—those floating, elemental jellyfish—are your ticket to the Spectral materials. They drop Spectral Husks, Spectral Hearts, and Spectral Nuclei depending on their level. Want Hearts? You need Specters at level 40 or higher. Nuclei? Level 60+ is your sweet spot. There’s a crafting safety net, too: three Husks transmute into one Heart, and three Hearts into one Nucleus at the alchemy bench. I often found myself combining the leftovers after a long farming sesh on Seirai Island, where Specters cluster like storm clouds.
What I loved about this grind was the variety. Each enemy felt like a puzzle—dodging their balloons of pain while my characters zapped them out of the sky. The totals you’ll need are hefty: 15 Husks, 30 Hearts, and 36 Nuclei (or their equivalent in crafting). But with Kokomi’s healing bursts as motivation, I’d hum little sea shanties and blast through them. Easy peasy lemon squeezy once you’ve got a rhythm going.
Varunada Lazurite: The Azurite Crown
Last but certainly not least, the ascension gem: Varunada Lazurite. This gemstone family—Sliver, Fragment, Chunk, Gemstone—is the universal Hydro rock. You’ll accumulate tons of it while fighting the Hydro Hypostasis for Dew, which is super convenient. In my early world levels, only Slivers and Fragments dropped, but as I climbed the World Level ladder, the Chunks and Gemstones began raining down. Here’s a handy table I wish I had glued to my monitor in 2022 (and it still holds true in 2026):
| World Level | Lazurite Dropped by Hydro Hypostasis |
|---|---|
| 0+ | Slivers |
| 2+ | Slivers, Fragments |
| 4+ | Slivers, Fragments, Chunks |
| 6+ | Slivers, Fragments, Chunks, Gemstones |
Beyond boss drops, you can craft from lower-tier gems, earn them from daily commissions, or convert existing stones using Dust of Azoth. I turned many a surplus Fragment into the final Gemstones I needed. The full set asks for 1 Sliver, 9 Fragments, 9 Chunks, and 6 Gemstones. A bit of alchemy, a pinch of luck, and boom—Kokomi’s Hydro heart sings.

The Final Tide
Looking back in this year 2026, with Kokomi fully ascended and gleaming in my roster, I can tell you: the journey was a love letter to patience. From pearl-diving at dawn to facing that stubborn cube, every step deepened my connection to Watatsumi’s mystical shores. The grind is real, but so is the satisfaction when those Hydro numbers ripple through a Spiral Abyss floor. If you’re just setting out, pack your resin, let the ocean guide you, and remember—even the quietest priestess can drown the mightiest foe with enough devotion. See you on the reefs, traveler.